Practical Solutions | Lime as a Sustainable Alternative in Building
Introduction
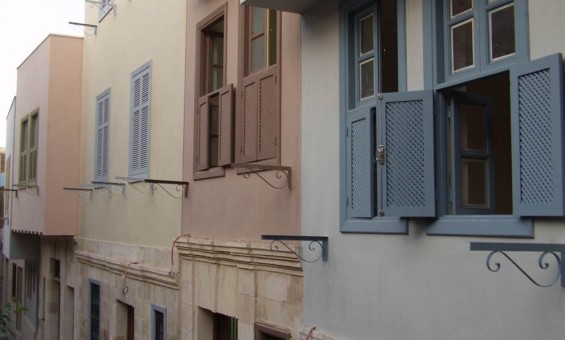
The promotion of modern gypsum-based plasters has led to the almost complete demise of lime plastering, as have the promotion of cement-based mortars and latex or emulsion paints for use of lime in these respective areas. Historical evidence, however, of use of lime in building for over 7,500 years of civilization history provides proof that the material has exceptional durability and resilience that makes it favorable over its new, faster-yielding synthetic counterparts. Reutilization of lime can have large-scale positive effects on building in Egypt in economic and ecological terms if it is adequately explored and developed to match our modern-day construction requirements.
Labor and Know-How
There is a real need for skilled labor in building with lime. The current training system works against anyone gaining this set of skills, as synthetic alternatives are dominating construction techniques. With the rapid spread of quicker, more direct applications, the know-how of building with lime has been largely lost, and the facilities reduced due to supply and demand changes.
WHY LIME? (Benefits of Lime)
- Time-Tested: It is used as the main building material for centuries, most ancient monuments built in Egypt that still stand today were built with lime.
- Availability: Lime raw materials are highly available in Egypt; quarries are present across the nation and in various areas along the Nile valley – including Cairo (in Muqattam hill).
- Permeable: Lime absorbs moisture and allows it to evaporate.
- High Breathability: One of the outstanding benefits of using lime as an internal or external finish is its high porosity. Lime allows you to build permeable wall systems, eliminating standing condensation. A lime-finished structure “breathes”, enabling moisture to evaporate.
- Weatherproof: Lime is weatherproof without being waterproof (as opposed to cement plasters), thus protecting the building without sealing it and preventing necessary internal water release.
- Flexible: Stone or brick laid with lime mortar can move as the earth moves – eliminating the need for expansion joints, as is necessary with cement mortars.
- Self-healing: When structures made of lime are subjected to vibrations (such as earthquakes or being in close proximity to a train track), they are more likely to develop many fine cracks rather than the individual large cracks, which occur in stiffer cement-bound structures. Water penetration into these fine cracks can dissolve “free” lime and bring it to the surface. As the water evaporates, this lime is then “re-deposited” and begins to self-fuse, healing the cracks. Since it does not get damp, waterproof insulation in order to protect other materials is not required either.
- Soft Texture: Plasters and mortars should not be harder than the backing surface to which they are applied – as is the case with cement plasters.Ecological: Lime plaster absorbs Carbon Dioxide (CO2) throughout its lifetime, offsetting the CO2 released during the manufacturing, thus being close to carbon neutral.Economic efficiency: It is a naturally low-cost material, especially in comparison to cement mixtures. Through practice in medium-to-large-scale projects, lime is found to be about 30% cheaper in building than its cement alternative.
QUICK BACKGROUND TO LIME PUTTY PREPARATION
Lime putty is the basic substance used in the various lime mixtures constituting mortar, plaster or any other building form, and it is made from Quicklime – the oxygenated form of lime, Calcium Oxide (CaO). In brief, lime putty preparation occurs by means of a process known as slaking, where quicklime is mixed with water and sieved, then left to mature for a minimum duration of 3 months. When the consistency has thickened to that of toothpaste, the pure white substance is removed from the water container and sieved well to becomes ready-to-use lime putty. In this form, by means of various mixtures, lime putty can be used to make mortars, fine skim, limewash or haired lime plaster. For the purposes of this brief manual, we will focus on the use of lime putty to make:
Lime putty has been prepared and used in large-scale heritage and development projects in Cairo such as Aga Khan’s Darb Al-Ahmar Revitalization Project in the Darb Al-Ahmar area of Old Cairo, in the early 2000’s. In this practice, a piece of land was allocated for the preparation of the ample amounts of lime putty required for the project. This land was housed by 8 tanks built to carry the lime and water mixture during the slaking process. These tanks, measuring 4m by 4m in surface area and 4m in depth (64 cubic meters), were built such that they rise 2m above ground level and are embedded 2m into the earth. The interior of these tanks are sufficiently insulated to prevent any water seepage, and this insulation is maintained every 6-12 months. Insulation consists of 3 layers over the brick: a layer of cement plaster, bitumen insulation sheets on top of that and a final layer of cement plaster carefully crafted to a smooth finish.
For the mixture process, the water is added first in the tank using a clean water tap source made available on site (as ample amounts of water are needed throughout the slaking process), the amount of which is equal to the quicklime to be added following. The quicklime is then unloaded off the truck onto laid out plastic covers on the ground surface before being poured into the tanks. The pouring is carried out slowly and carefully as the reaction of the two elements causes expansion and produces large amounts of heat, thus requiring adequate precautionary measures on the workers’ part .
Once the full amount of quicklime is added and settled into the base of the tank under the water, the mixture is left to slake for the minimum duration of 3 months , the Darb Al-Ahmar practice having left it for 6 months and more, for better product quality. The longer the product is slaked the more it matures; some highly specialized heritage conservation projects require several years of slaking. The quicklime absorbs the water fast, and so water is refilled in the tank on a daily basis to maintain the reactive process.
After the lime putty has matured, it is shoveled out to first be sieved using metal or porous fabric sieves to eliminate any remaining residue, and the produced putty is emptied into plastic barrels and kept under a thin layer of water for storage until use.

Turning mixture during slaking – Turning mixture during slaking – Sieving slaked lime
Source : The Aga Khan Trust for Culture; UNESCO; Cooperazione Italiana
It is important to note that dry hydrated lime powder (or particles) may be used instead of quicklime to create lime putty as it eliminates the danger risks associated with quicklime that has not yet been slaked. To ensure optimum quality, however, the dry hydrated lime must also be kept in a basin of water for 3 months as is done with quicklime – to allow for full maturity of the putty.
LIME USE STANDARDS AND GENERAL GUIDELINES
Before proceeding into the step-by-step guides of how to work with lime in the three respective areas (mortar, plaster and paint), some general working guidelines must be outlined, which apply to the three types of practices.
- Although lime is a relatively inexpensive material, it must be dealt with in the utmost care so that it is not contaminated, in order to achieve the best results.
- The nature and properties of the raw materials differ from one location to another, thus it is important that the above given guidelines are applied as a basic reference and tested on a sample area on site before being applied to the entire surface, or space.
- Building works must be complete – including full curing and solidification – before plastering and painting works are approached. This is to avoid cracking occurring due to mortar retraction before complete settlement.
- Dusting and cleaning the applied surfaces before plastering is critical practice to ensure strong adhesion between the lime mixtures and the backing surface.
- Beams, wood works, and/or electricity ductwork ought to be covered with wire mesh, held in place with non-corrosive steel nails, in order to prevent cracking due to the constant movement of these elements inside the wall structure.
- In order to delay the drying process of completed lime works, it is recommended that exterior works be carried out right before sunset, while interior finishing may take place during the day, as long as the work is protected from sun and/or wind exposure.
- Use of clean water is a must especially for use in painting works, tap water is often used in lime paint application.
- Used tools must be cleaned regularly – even during work procession – as lime has caustic and vigorous setting properties that may impair the efficiency of the tools as residue is hardened on the surface, which in turn reduces the efficiency of the produced work as well. For metal tools, maintenance can be achieved by drying and wiping the tool over with an oily rag to protect it against rust, whereas wooden tools should be laid flat and kept out of the sun after cleaning in order to prevent blade warping which occurs if the tool is dried out too quickly.
There is a general misconception in construction and building that the purpose of mortar is merely to stick the building bricks together and hence that the more solidified it is, the better. In truth, the main purpose of mortar is to act as a lubricating agent between the building blocks by evenly distributing loads applied on the built structure. This requires that the mortar retain some measure of flexibility, and this is made possible through the usage of lime rather than cement, which is rigid when hardened. Mortar is also meant to breathe out excess moisture which is harmful for the building, which lime is capable of doing through its natural breathable nature.
MATERIALS AND TOOLS NEEDED
- Dry lime1 or lime putty, prepared as previously outlined in this article, to be used only after slaking had matured.
- Clean, well-graded sand (consisting of a wide range of aggregate sizes), and containing sharp, angular particles which cannot be rolled around when rubbed between the fingers easily.
- Clean source of water, good enough for drinking (to keep down the soluble salts content and prolong the life of the masonry)
- Admixtures, as needed, such as red brick dust 2 (used as a pozzolan; function described in Mortar Mixture section) and cement (possibly added to increase the mortar’s strength)
- Sieves for different aggregate sizes, the final sample should maintain an equal particle size distribution.
- Bucket, scuttle, or other fixed measuring container
- A clean, solid surface for mortar to be mixed on (clean plastic cover over the floor will do – as it does not allow for water to dissipate from the mixture).
- Shovel for mixing
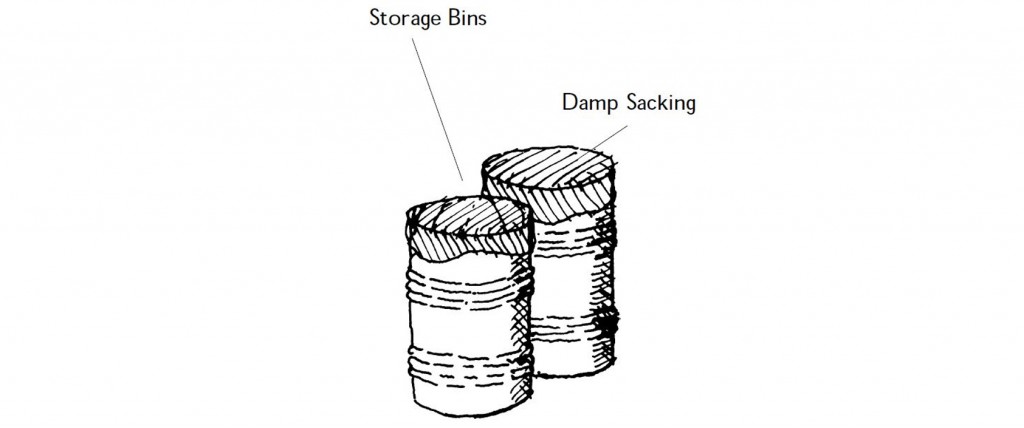
- A number of galvanized or plastic bins for storage, and damp sacking and palm leaves for cover.
- Brick trowel, brick jointer, level, string line and any other tools conventionally used in the application of mortar.
- Stiff brush for final surface cleaning.
MORTAR MIXTURE
Using a bucket, scuttle or any other container, the quantities are measured by size such that the following ratio is achieved in the mortar mixture:
Welding material is that portion of the mixture whose main role is to weld the elements together, and in the following mixture, this consists of lime. The fill material is the inert material present in the mixture and it represents those elements that are included in order to reduce shrinkage, increase absorption, porosity and workability, as well as aid in the curing process. The fill material component in this mixture consists of sand and red brick dust, which is often mistaken for welding material. Maintaining this ratio is important in order to yield the most successful results with the produced mortar in terms of consistency and overall efficacy.
This ratio, however, may be slightly varied on site depending on the use requirement and depending on the nature of the available material. For example, if the sand used is soft in texture, welding material may be increased to compensate for the reduced qualification of the used sand.
Below are the ratios by size of lime mortar and cement-mixed lime mortar, to be used as needed, both healthier alternatives to the cement-based mortars for the reasons specified earlier – except in below-ground foundation work, where conventional cement mortars are required.
Lime Mortar
A widely-used mortar type up to the early 20th Century when cement alternatives were introduced, lime mortars are highly qualified and effective mortars. In effect, lime putty is mixed with water and sand in the ratios below, possibly with some Pozzolanic materials 3 in order to aid in complete carbonation when applied. Red brick dust is one such agent, commonly used in lime mixtures.
This mixture can be tailored to allow for more red brick dust, which acts as a binding agent, speeding up the process – should its quality be of qualified standard. This is, however, sampled in a small area on site to ensure adequate efficacy. This variation may be carried out as following.
Cement-mixed Lime Mortar
This mixture is often used to help the lime set more quickly, and it is applied in the ratios that follow.
When used in wet areas such as bathrooms and kitchens, the following ratios are proposed.
It ought to be noted that all these variations conform to the general rule which is the fixed ratio between welding and fill material in the mixture as outlined above.
PREPARATION AND IMPLEMENTATION STEPS
1) Mixing surface preparation: A clean surface is provided for mixing, if mixing must occur on the floor, a plastic cover may be laid out to prevent the mixture from getting exposed to dust or impurities, to prevent the pollution or quick solidification of the mortar mix. The masonry units must be cleaned as well and well dampened, but not too much that water stands when the building process begins. The point is to encourage slow drying .
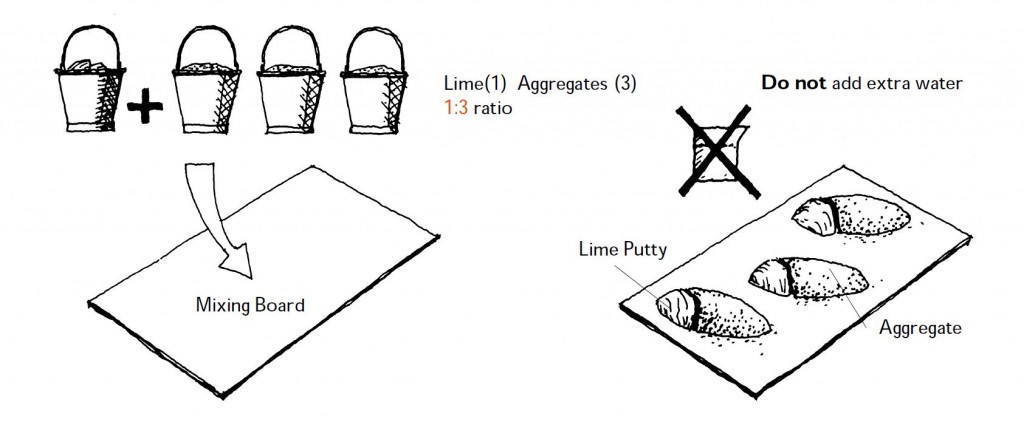
Setting out mixture components
Source : The Aga Khan Trust for Culture; UNESCO; Cooperazione Italiana
2) Dry mixing: Sand is first laid out across the mixing surface, and then the cement and dry lime are added and mixed dryly with the sand according to the mixture ratios provided above, until the mixture shows a homogenous color. Note: If lime putty is used instead of dry lime, it is diluted with water first and mixed well before being added to the dry mixture .
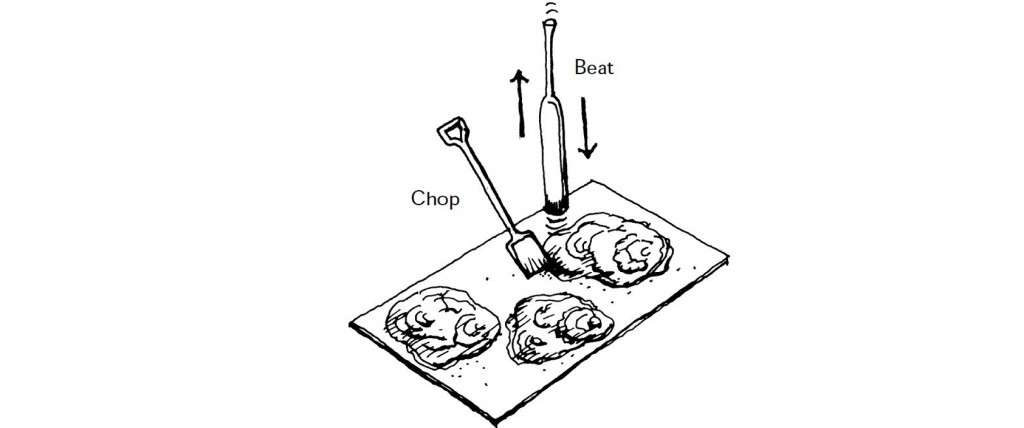
Chopping and beating aggregates into piles of lime
Source : The Aga Khan Trust for Culture; UNESCO; Cooperazione Italiana
3) Water addition: Water is then added to the mixture gradually until a soft texture resembling a thick batter is achieved. The consistency is measured using the concrete trowel: water is added slowly until the mix is flexible enough to spread easily without sliding off the trowel.
4) Storage before use: It is important that the mixture is stored for the longest time before use to enable sufficient maturity. Lime mortars that have not matured for long enough will not allow the lime to bond well with the aggregate. The longer it is stored before use, the better. During this time of storage, the mortar may be covered with damp sacking or palm leaves to prevent unwanted contact with air.
5) Application
- Over the foundation, a mortar bed of about 1-2cm thickness is laid out along the string line, and the mortar is applied in between brick courses in about 10mm-thick layers, using the level and string line to ensure the wall is plumb and straight throughout the building process.
- In horizontal bricklaying, the side of each newly-laid brick is simply ‘buttered up’ and the next brick abutted to it.
- In the end, the brick jointer is used to scrape off any excess mortar or fill in visibly lacking areas to finish off the beds before they dry. If the bare built wall serves as the final finish (no plastering works intended), a thickness of about 10mm or the thickness of the joint (whichever is greater) is scraped out of the mortar bed before it dries off, leaving a recess in the wall that is repointed after the mortar bed has dried, using the same mortar, to be flush with the rest of the wall .
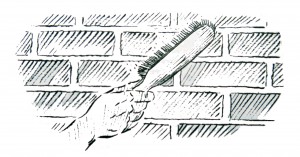
- Using the stiff brush, any laitance is carefully scraped off, as fine materials (usually lime) that tend to surface after pressing in and working of the joints will seal the mortar off from needed air and moisture for carbonation .
- At the end of a day’s work, the completed work must be protected from sun and strong winds, for the same reason it is kept damp initially – to enhance carbonation conditions. It may be covered with wet hessian or plastic sheeting overnight, and must generally retain some level of moisture for at least a few days.
Plastering is often confused with painting, and they are two distinct procedures: plastering is a prerequisite to the final paint finish – acting as an intermediate layer that is fair-faced and evened out as a base for the paint, making the final finish smoother, healthier and more practical for final finish application. Moreover, lime plaster possesses a major asset in that it is resistant to fire.
MATERIALS AND TOOLS NEEDED
- Lime putty, prepared as previously outlined in this article, to be used only after having been kept under water for the duration of no less than 3 months.
- Clean, well-graded sand (consisting of a wide range of aggregate sizes)
- Additives, as needed, such as red brick dust and cement
- Sieves or screens for sieving the ungraded sand. Mesh sizes of 5.00 mm (ASTM No. 4), 1.18 mm (ASTM No. 16) and 1.00 mm (ASTM No. 20) are suitable for the different layers of plaster: used for the spatterdash coat sand, the internal lime undercoat sand and the internal lime finishing coat sand respectively.
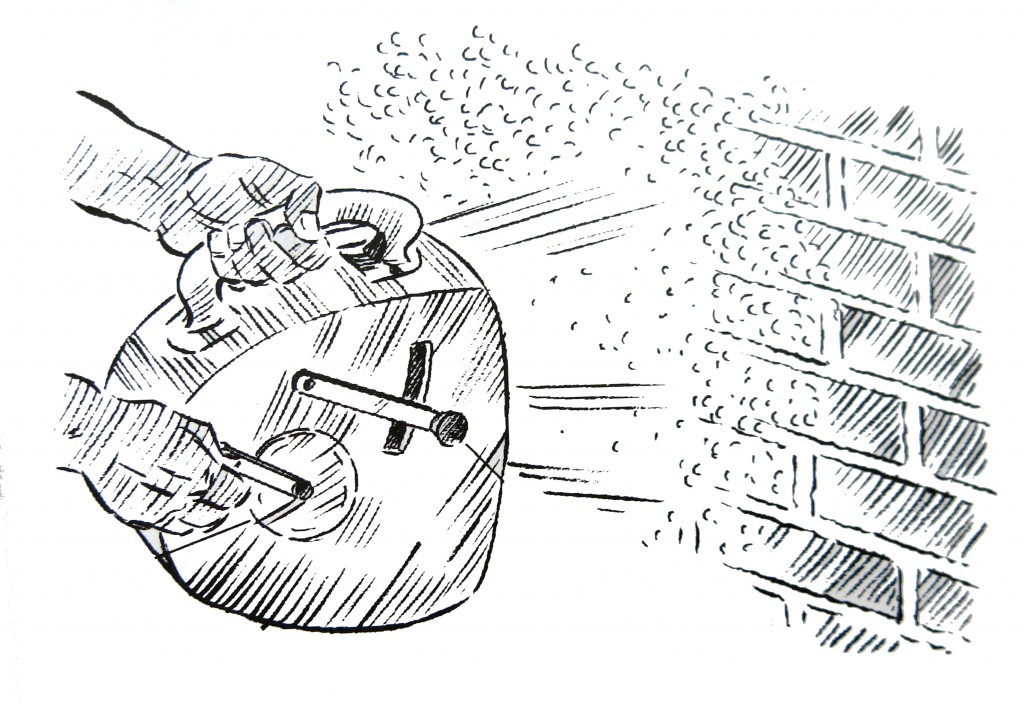
- Manual harling trowel or Spatterdash machine for harling. If spatterdash machine is used, however, it must be loaded in small quantities over equal intervals to produce good results. The notch should also be set not lower than 2, especially if the machine is new.
- Typical tools used in plastering works: plasterer’s hawk, featheredge, metal and plastic different-shaped trowels (for laying on and gauging), a devil float or comb scratcher, and a hand float for scouring or rubbing up the finishing.
- Bucket, scuttle, or other fixed measuring container
- Shovel for mixing
- Brick trowel, levels, line and pins, and other tools conventionally used in the application of mortar.
- Stiff brush for surface cleaning
- Clean source of water
PLASTERING MORTAR MIXTURE
The quality of plasterwork increases as the number of layers is increased and the thickness of each layer is reduced. There are different types of plaster works, ranging from 1 to 3 layers. Single-layer works are not at all recommended, while double-layer works are reasonable practice for economic efficiency.
Double-layer plaster: consists of a spatterdash coat and the internal lime finishing coat only.
Triple-layer plaster: consists of a spatterdash coat, the internal lime undercoat and the internal lime finishing coat.
Using a bucket, scuttle or any other container, quantities are measured by size such that the following ratio is achieved in the mortar mixture:
The above ratio presents a guiding principle; practical tests on site must take place.
Inner layers of plaster act as rough layers, while the outer layers ought to bear a smooth finish. Thus, generally, rougher sand textures are used in the innermost layers, as well as lower percentages of lime; while the outer layers contain smooth-textured sands and higher percentages of lime (which is a naturally smooth material).
Spatterdash coat plaster mortar mix ratio:
Internal lime undercoat mix ratio:
Internal lime finishing coat mix ratio:
* Lime may be more concentrated in the finishing coat layer mix for a smoother finish, reaching up to the same proportion as the sand. However, this mixture must be sampled first on site to ensure its efficacy in application.
In the outermost layer mix (whether in a double-layer or triple-layer plaster), cement may be added to the mixture as needed, in which case its relative amount is a quarter (0.25) of a full bucket or scuttle – as used in the mix for measuring.
PREPARATION AND IMPLEMENTATION STEPS
1) Preparing the surface intended for plastering: this step is undertaken in order to eliminate small, unseen impurities that serve as insulating barriers that hinder the adhesive effect of the applied plaster, as directed following.
- Surface must firstly be cleaned from any obstructions or impurities. This may be done using stiff brush, carefully eliminating dust particles that act as an insulating surface, especially stone dust if stone blocks are used.
- While the surface is being cleaned, it must be washed and splattered with water in ample amounts and regularly over a 3-day period at minimum. This is done so that the dry walls are supplemented with continuous, deep and adequate moisture, preventing total water absorption, which serves to reduce the quality of the plastering work.
- Plastering mortar is then prepared using the same standards and techniques applied in building mortar (see above ).
2) Applying the spatterdash coat: this step is crucial (especially when stone blocks are used), because it serves as a rough layer between the brick/stone layer and the plaster layer, which are both smooth and hence, will not achieve sufficient grip. The two-step spatter dash coat application is as follows.
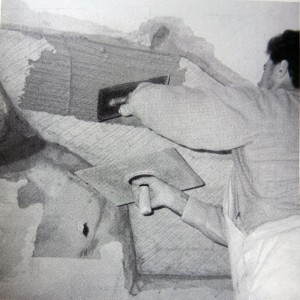
- Using the manual harling trowel, the metal trowel or the spatterdash machine, the mortar is forcibly thrown onto the surface. The semi-liquid mortar layer is then applied to the entire surface and left to dry partially .
- Before the first layer is completely dry, using the same mortar mix, a second layer of thicker mortar consistency is applied in the same manner as the first. Both layers should reach an overall depth of 0.50 – 1.50 cm off the wall surface.
- After both layers are completed, the scratch coat is left to solidify completely, and is splattered continuously with water over a period of 3-7 days.
3) Applying the internal lime undercoat: this step entails a number of procedures as outlined below.
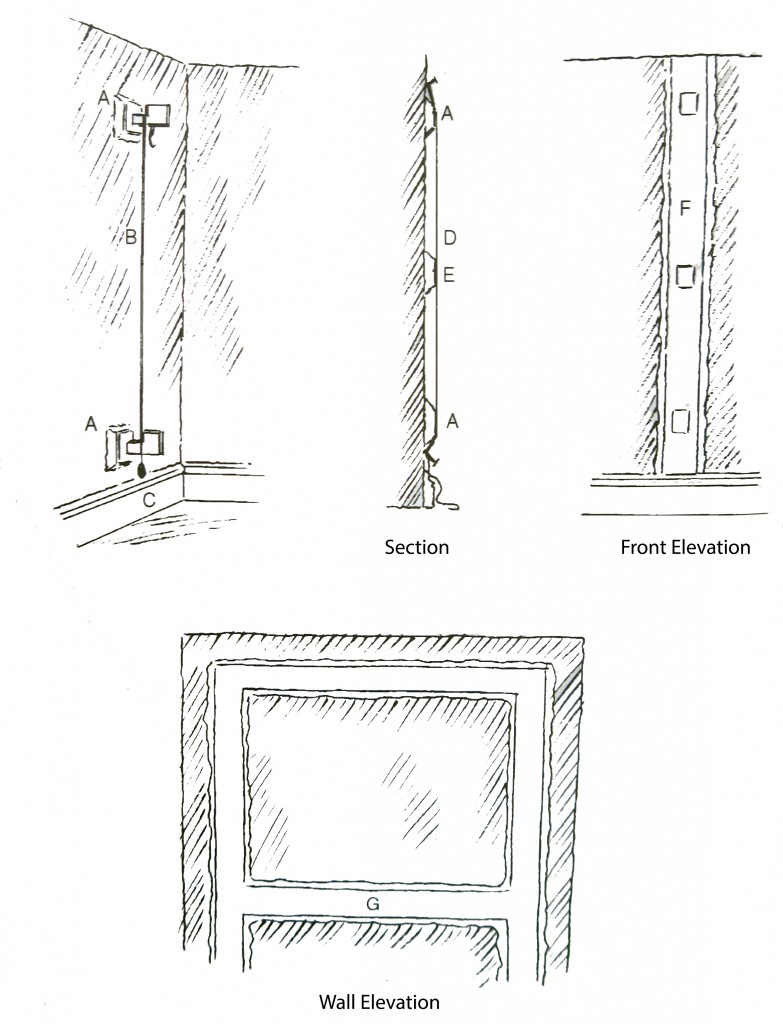
- String lines are used to achieve a levelled surface finish. Firstly, small plaster ‘dots’, made of lime-mixed gypsum, measuring about 8.00 cm x 5.00 cm and of the mortar bed depth, are installed at several boundary points across the surface. The string lines are then supported on these nodes (made of lime-mixed gypsum for quick solidification), achieving verticality using the plumb bob (in the case of walls), and using a featheredge and water balance (level) in case of ceilings. This technique ensures that the plaster layer is completely straight and leveled vertically/horizontally – the dots must be placed such that the distance between the axes created is no more than 2.0 m .
- Once the dots have solidified, they are connected via straight lines of plastering mortar for walls and lime-mixed gypsum for ceilings, to act as reference lines for the plastering infill. These connecting lines are known as screeds.
- Water is to be sprayed generously over the mortar-covered surface, immediately prior to final plastering.
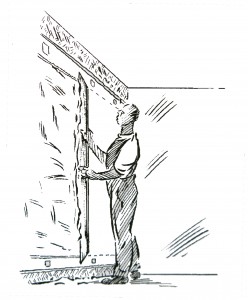
- The mortar is then smoothened using the featheredge to the desired level, removing excess and filling the remaining areas of the surface until the surface is leveled with the previously-made screeds and smoothened to a flat finish. In order to achieve this efficiently and successfully, scouring must occur vigorously and evenly using the hand float, after the plaster is left to harden a little but before it is completely dry .
- The texture is then roughened with the plastic trowel and left to ventilate.
- Using the devil float, the plastered surface is scratched to make wavy horizontal indentations about 3mm deep and 5cm apart . A comb scratcher is better used instead of a devil float in areas that are small and molded .
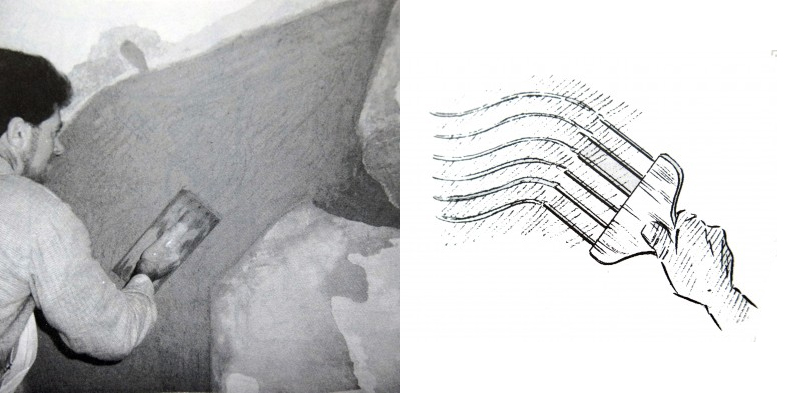
Left: using a devil float / Right: comb scratching second coat small areas
Source: Holmes & Wingate, 2000
- Water is sprayed regularly on the plastered surface until it is completely cured and solidified.
- Once the plaster layer is completely solidifed, the screeds are broken off if they were made using a mix that is different from the plastering mortar, and the resulting pockets filled in with the remaining plastering mortar. The completed plaster layer should reach about 1.5cm in depth.
4) Applying the internal lime finishing coat: the same steps are carried out as with the internal lime undercoat, while the external finish is treated as required: rough as outlined above or treated by adding mortar and smoothening out with a float to achieve a desired polished finish. The finishing coat should be no more the 0.50 cm in depth .
One of the general misconceptions in Egypt towards limewash (or lime paint) is that it is of lower quality than alternative paint types. The final quality of the lime paint finish goes back to the application technique, and poor lime finishes are usually a result of poor implementation rather than poor material. Well-applied lime paints also reserve the advantage of cleaning and washing as with other contemporary paints.
Lime paints are a family of paints which can be applied to other porous surfaces such as lime-plastered surfaces, earth-composed surfaces and direct walls. As a self-healing, breathable material, lime prevents the entrapment of water within the element it is applied to and hence increases the lifespan of the building – making porosity of materials a crucial element in design.
The lack of chemicals within the composition of lime paints also makes the final finish a healthier alternative for the building – the same concept applies to the drying and treatment phase as lime does not give off hazardous fumes. Pigments may be added to the lime mixture in order to give it the desired finish colors.
Lime paint also has an advantage over alternate types when used as exterior paint as it is not affected by ultraviolet radiation from the sun, which destroys synthetic paints.
Requiring a significant level of accuracy and care in application, lime paint becomes a highly particular material, and thus its properties become fixed – making alteration to match certain conditions difficult, as may be made possible with other contemporary paints.
MATERIALS AND TOOLS NEEDED
- Lime putty, prepared as previously outlined in this article, to be used only after having been kept under water for the duration of no less than 3 months.
- Chiffon fabric for sieving, or any such tightly-pored material (muslin cloth is also suitable).
- Binders and admixtures, as needed, such as PVA glue and Rashidi salt or table salt.
- Color Pigments: natural metal oxides are preferred, although manufactured pigments can be used if they are water-based (can be dissolved in water).
- Stiff brush
- Various paint brushes as needed, with rough textured bristles, to be used only with limewash (residue lime in the brushes will affect other paints if used with them).
- Small trowel
- A suitable container for holding the paint to be applied.
- Whisk and stirrers for stirring the paint.
- Clean source of water.
- Hand pumped spray.
PREPARATION AND IMPLEMENTATION STEPS
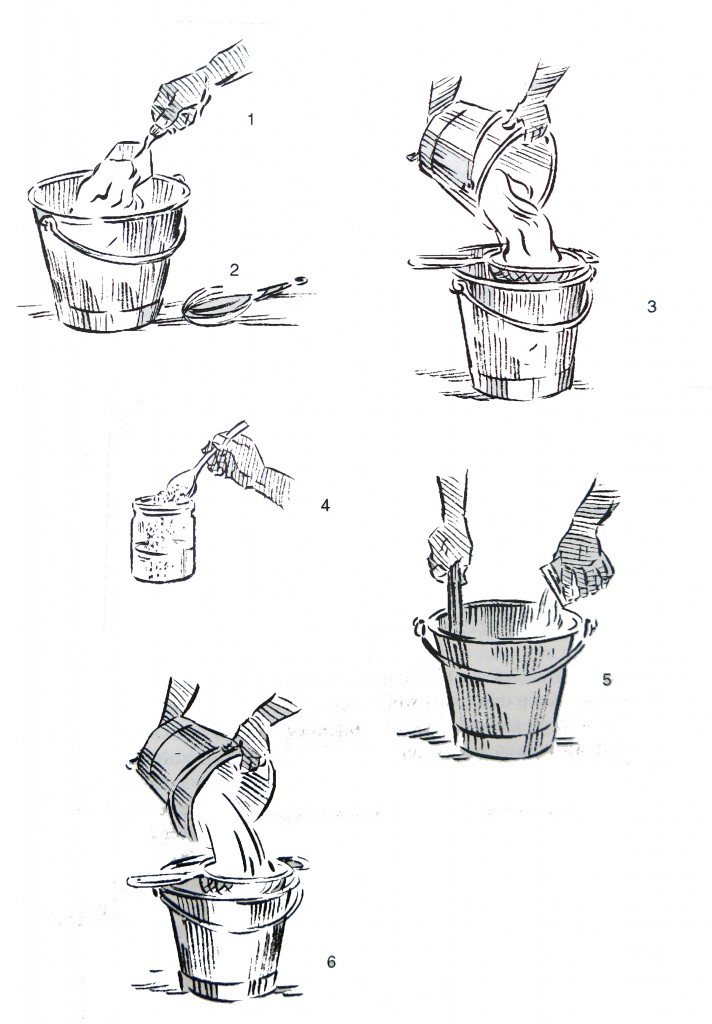
Preparing paint mixture
Source: Holmes & Wingate, 2000
Image adapted to fit procedural content in article
1) Preparing and sieving the lime putty:
- The lime putty is firstly beaten to take out any stiffness.
- Clean water is gently added to an amount of the lime putty until it is diluted into a thin cream.
- Then, the mixture is sieved using the chiffon – or other similar fabric – into a bucket or suitable container. The produced lime should consist of fine particles of very smooth texture – the appearance and consistency of which are similar to that of milk.
2) Adding the color pigments (if desired): Hot water is added to the color oxide powder, and it is mixed well and sieved the same way the lime putty was and allowed time to stand. It is then mixed with the prepared lime putty to achieve the intended color paint. Note that if color pigments are used, it is recommended that the full amount required to cover the colored surface is prepared in one batch to ensure the color consistency across the applied surface. The color of the liquid wash will always be much darker than the dry color, and so samples may be tested externally on paper and left to dry in the sun to convey the real color to be produced when the paint is applied. Once the mix is ready, it ought to be stirred regularly throughout the application process in order to maintain its texture and milky consistency.
3) Adding the binders and admixtures:
- PVA glue: PVA glue may be added in small amounts to aid in the consistency of the lime paint, preventing breakage. The proportion in which it is added should not exceed one part glue to 20 parts lime putty.
- Rashidi Salt or table salt: Salt may be added to the mixture to increase its solubility and help the paint retain moisture for a longer period of time.
4)Preparing the surface to be painted: The surface to be limewashed ought to be cleaned from any dirt, grease or impurities present. Then, it is damped down using the hand pumped spray equally across the surface and from an adequate distance or by splashing from a brush, such that the surface does not run wet. The water is sprayed plentifully, and immediately prior to the painting process.
5) Painting the surface: Using a clean paint brush, the painting process ought to be carried out quickly, ensuring that the surface has not dried as the paint is being applied, as this will not allow the lime to carbonate effectively, and will thus reduce the quality of the final finish. In hot weather, the work may be covered with damp sacking or sprayed regularly using a fine-nozzle spray. Paint is applied in two or three fine layers, which may appear transparent at first. Each layer must be left to dry for one day before the next one is applied, dampening the wall each time before application of the coat.
The images used in this gallery are all the property of The Aga Khan Trust for Culture foundation. They display images of projects completed by the firm in various areas across Egypt such as al-Darb al-Ahmar and `Izbit Khayrallah in Cairo, al-Minya and Bani Soliman in Bani Swaif.
References
Battle, Stephen and Tony Steel. Conservation and Design Guidelines for Zanzibar Stone Town. Geneva: Aga Khan Trust for Culture, 2001.
Holmes, S., & Wingate, M. (2002). Building with lime: A practical introduction (Rev. ed.). London: ITDG.
إبراهيم, ك, جورج, ن, وقطب, م. (2006). الدليل الإرشادي لأعمال البناء بالمنيا. مؤسسة الحياة الأفضل للتنمية الشاملة بالمنيا (BLACD) .
2.Red brick dust used as a pozzolan ought to be produced from old red brick which is still produced in certain areas across Cairo. New red brick produced and used in mass construction is made to a chemical composure that does not retain the same pozzolanic qualities and will not yield effective results.
3.Pozzolonic materials are those materials which are capable of binding calcium hydroxide in the presence of water, aiding in the carbonation of the mortar joints throughout the wall depth.






Comments